
I’ve discussed before about making the most of family vacations to take photographs as a cost saving measure. The drawback of this is that I have to take the pictures as they come. In other words, whenever we’re going to a certain place, that’s the weather and timing I have to deal with. I recognize that often career photographers also have weather issues, but they also have the flexibility to reschedule, extend their stay, or wait out bad weather in hopes of an interesting shot. When I’m traveling with family, that is often not possible.
The nice thing about modern digital photography is that there are many post production options for tweaking photographs. As a photo hobbyist and now burgeoning pro, I wanted to find good tools that were not super expensive. I looked for viable alternatives to Photoshop which is much more complex and much more expensive. Luminar by Skylum is one such program I’ve discovered. It’s relatively inexpensive, it’s easy and intuitive to use, and I think it does a wonderful job of livening up photos that need it. Luminar has become my go to editor for my photographs.
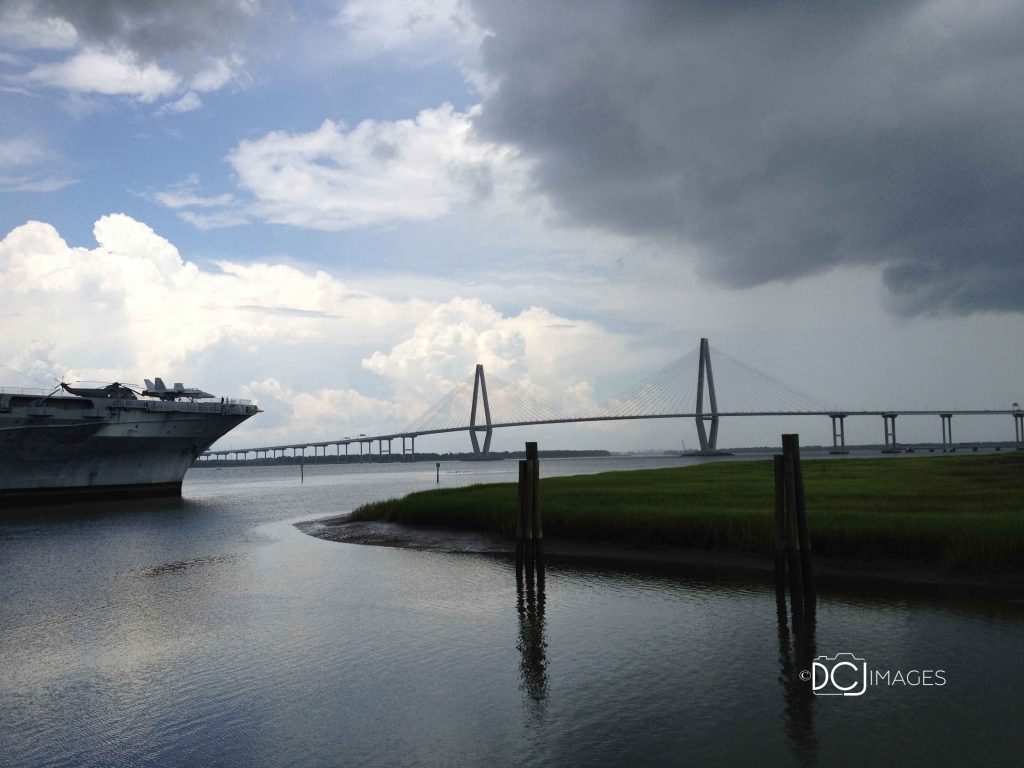
On this day, we were in Charleston, South Carolina visiting the USS Yorktown. This former Naval aircraft carrier has been turned into a museum and as my guys love ships, this visit was a huge hit. It also rained most of the day. It was cloudy and dark which made for bland photos. Enter Luminar.
The Original Photograph
This was my original photo. It was taken from the walking bridge that led to the ship. As you can see, the content was pretty good, but the colors are dark and flat. I decided to see what Luminar could do to liven up this photograph.
Step 1: Crop, Rotate, and AI Enhancement
The first thing I did was straighten the photo a little bit using the crop rotate tool. I wanted the end of the bridge to be parallel to the bottom edge. Then I used the AI Enhancement Filter in the Landscape grouping of the Luminar Looks. That brought me to here:
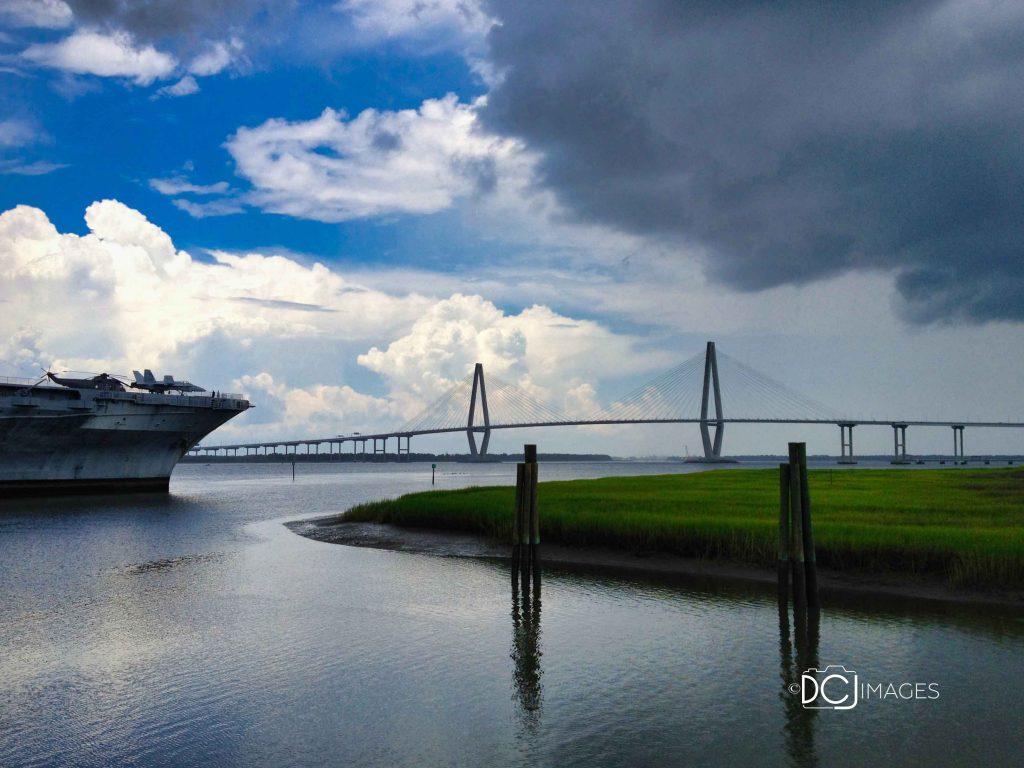
Step 2: Fix the Dark Areas
The sky is much better, but the lower half of the photo is still too dark. Next, I decided to add an adjustment layer with a mask that covered just the grass. I didn’t get want the water to get too bright become a distraction from the rest of the photo. After upping the exposure on the grassy area, I thought it looked much better.
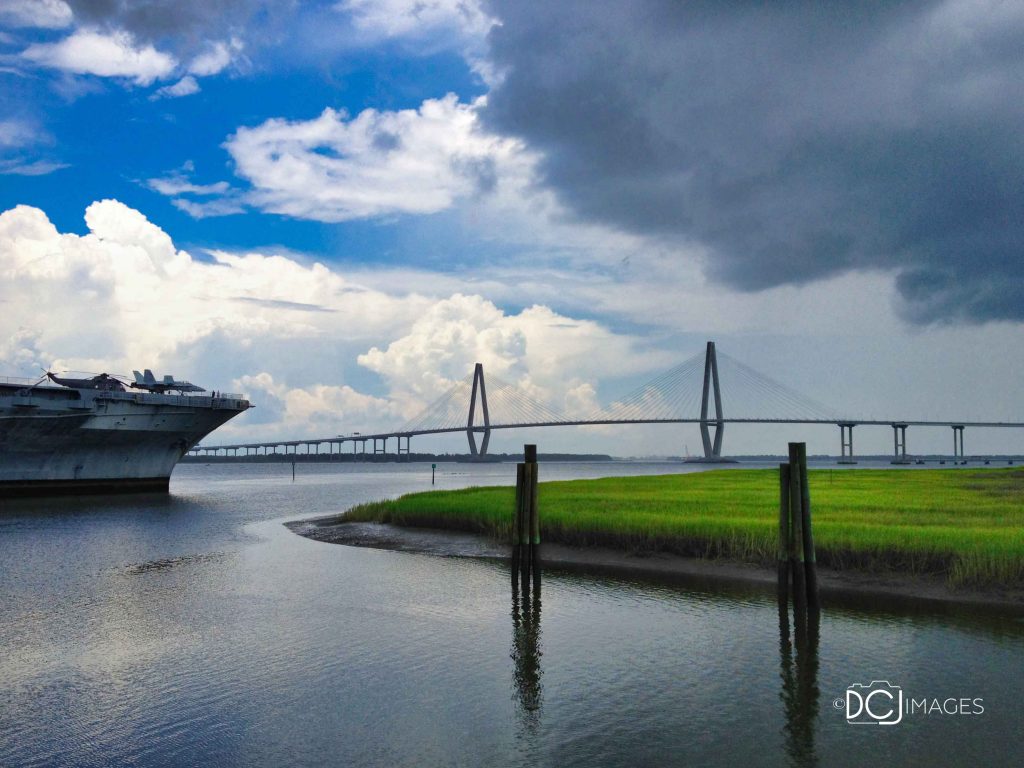
Step 3: Fix One Other Dark Area
Finally, the ship was still too dark for my tastes. So I created another adjustment layer and mask for just the ship and adjusted the exposure on the ship as well. The grassy area and the ship could have been on the same layer, but I wanted the flexibility of altering them individually.
Here is my final image. This photo went from one that I found boring to one that has become my favorite of that trip. As you can see using Luminar to liven up photographs is quick and easy.

If you’re interested in trying out Luminar, here is a link to get your copy: Luminar by Skylum .
Note: The links in this post are affiliate links which means I earn a small commission if you use this link to buy the product. The best part? No added cost for you! I consider that a win -win!
Another Note: If you’re interested in owning any of my photographs, please contact me through the site. I can currently print up to an 11″ x 17″.


